Reviewed by John Newman, P.E. (Licensed Structural Engineer)
STRICT LIABILITY DISCLAIMER: This article is for educational purposes only. Structural modifications carry a high risk of fatal injury, voided insurance, and catastrophic property damage. The information below cannot replace an on-site evaluation. You must hire a licensed structural engineer and secure municipal permits before altering any wall.
How Structural Engineers Map Load Paths (And Why You Cannot DIY)
Relying on internet checklists to identify load-bearing walls is a severe safety hazard. The structural integrity of a home relies on dynamic calculations involving span tables (such as those found in the International Residential Code – IRC Section R502), point loads, shear walls, and deflection limits (e.g., L/360 for floor joists). Builders frequently hide complex shear structures, cripple studs, and offset point loads behind standard drywall.
Instead of relying on visual guesswork, a licensed structural engineer builds a comprehensive load path model. This involves tracing how the exact dead weight of the roof and upper floors transfers through the framing down to the concrete foundation. They account for lateral forces (wind and seismic activity) that exterior shear walls must resist. For example, in a recent 1920s bungalow renovation, what appeared to be a simple partition wall was actually carrying the offset load of a spliced ridge beam—a detail only revealed through tracing the load path to the foundation.
The Structural Risks of Miscalculation
Mistakenly knocking down a structural wall without proper temporary shoring and a permanent beam transfers thousands of pounds of pressure to unsupported areas. This typically results in severely bowing floors, jammed doors, a sagging ceiling, or upwards of $50,000 in foundation and framing damage.
What Does a Structural Engineer Actually Do?
Using International Residential Code (IRC) span tables and local wind/seismic data, the engineer calculates the required section modulus. This mathematical model dictates whether your load path requires a standard LVL timber beam or a heavy-duty steel I-beam to prevent the upper floors from sagging. Their process typically includes:
- The On-Site Inspection: Tracing the precise load path from your roof all the way down to your foundation.
- Mathematical Load Calculations: Determining the exact size, weight capacity, and material of the beam (such as a glulam, LVL timber beam, or steel I-beam secured with Simpson Strong-Tie hardware) required to safely replace the wall.
- Stamped Architectural Plans: Providing officially stamped engineering drawings that detail exactly how the new support system must be installed.
The Permitting Process: Why the City Requires an Engineer
Removing a load-bearing wall is not a project you can do under the radar. Municipalities enforce strict building codes for structural modifications. For example, jurisdictions like the City of Raleigh require a formal permit application accompanied by the engineer’s stamped drawings before any demolition begins. To get this permit approved, the process demands specific documentation: a formal permit application, municipal review of the engineer’s stamped drawings, and mandatory on-site inspections (such as rough framing and final) to close out the permit. Unpermitted structural modifications face incredibly high permit rejection rates after the fact, resulting in severe fines, stop-work orders, and voided homeowner’s insurance.
Cost Analysis: Engineer Fees vs. Cost of Structural Repairs
Homeowners often hesitate to hire an engineer because of the upfront cost, which typically ranges from $500 to $1,500 depending on the complexity of the project. However, compare this to the cost of guessing wrong. Repairing a compromised roof, fixing a cracking foundation, or restoring a collapsed floor easily exceeds $20,000 to $50,000. The engineer’s fee is a non-negotiable insurance policy.
How Long Does The Work Take?
The timeline depends on complexity, but here is a realistic breakdown for a professional removal:
- Engineering & Permitting: 2–4 Weeks (Before work starts).
- Demolition & Beam Installation: 2–3 Days.
- Moving Utilities (HVAC/Electric): 1–3 Days.
- Drywall & Flooring Patching: 3–5 Days (includes drying time).
- Total: Expect 1–2 weeks of active construction dust.
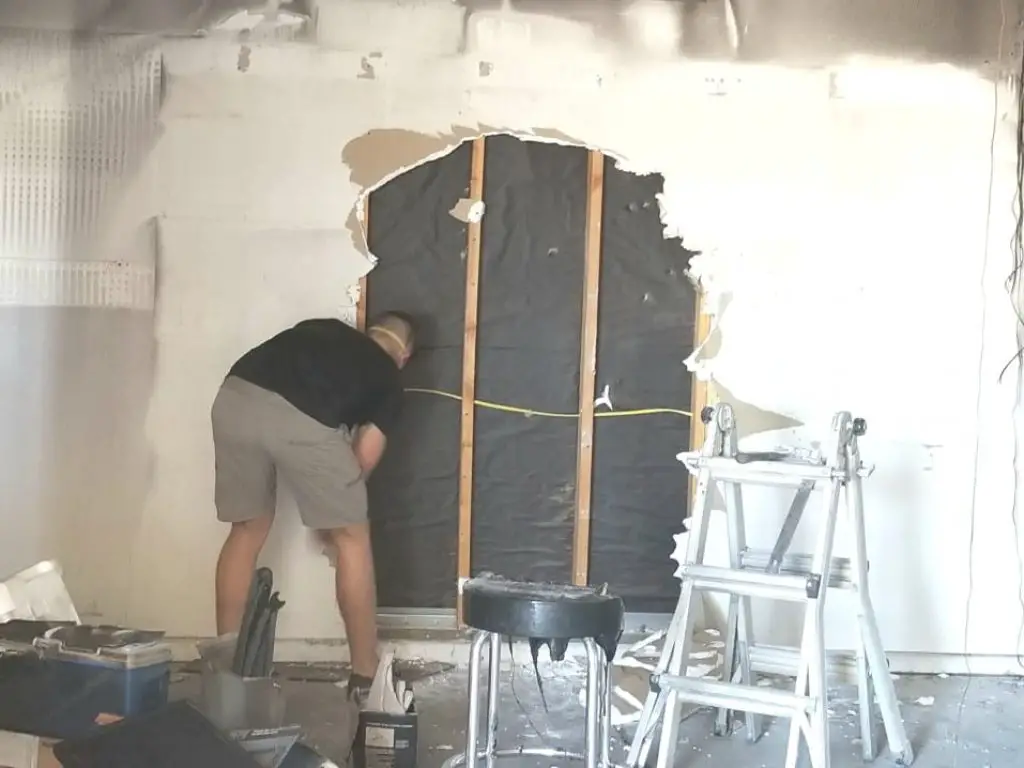
The Hidden Dangers: What’s Inside the Wall?
While an engineer will handle the structural math, you also need to worry about the systems hidden inside the wall. STOP. Before your demolition contractor breaches the drywall, they must map the home’s mechanical systems. Failing to properly isolate these utilities prior to a structural tear-out can cause electrocution, flooding, or toxic contamination.
1. Electrical Wires (The Fire Risk) Most walls contain electrical cables running horizontally through studs or vertically to outlets/switches.
- The Risk: Striking a live wire can cause immediate electrocution or start a fire inside the wall cavity.
- The Fix: Your licensed electrician must physically trace, disconnect, and reroute the circuit. Professional crews never rely on external stud finders to verify dead wires before removing a wall.
2. Plumbing Pipes (The Flood Risk) Bathrooms, kitchens, and laundry rooms are obvious, but supply lines often travel through “wet walls” to reach upper floors.
- The Risk: Cutting a pressurized pipe will flood your home in seconds, causing thousands of dollars in water damage.
- The Fix: Your contractor must physically trace supply lines and safely cap pressurized plumbing stacks prior to removing the wet wall framing to prevent catastrophic flooding.
3. HVAC Ducts (The Airflow Risk) Large boxy bulkheads often hide air ducts, but smaller supply vents can run inside standard wall cavities.
- The Risk: Crushing or cutting a duct ruins your home’s heating efficiency and creates a path for dust/debris to enter your furnace.
- The Fix: HVAC technicians must reroute supply and return drops, completely recalculating the home’s airflow loads before the new structural support beam is set.
DANGER: Asbestos & Lead (The Invisible Hazards)
Lead Paint: If built before 1978, do not dry-scrape or hammer the wall. You must comply with the EPA’s Lead Renovation, Repair and Painting (RRP) Rule. Use an EPA-recognized test kit first.
Asbestos: If built before 1980, joint compound and popcorn textures likely contain asbestos. You must lab-test a sample before demolition in accordance with OSHA Asbestos standards.
Conclusion: Protect Your Home and Your Life
Next Steps: Verify your structural engineer’s active P.E. license through your state’s Board of Examiners database. Once vetted, commission them to draft the stamped architectural plans required to file your local building permit—such as the mandatory structural review required by the City of Raleigh—before taking any bids from demolition contractors.


