Disclosure: The author has a commercial background in lead abatement products. This article may contain affiliate links to EPA-approved safety and testing equipment.
Restoring a vintage cast iron radiator can completely transform a room, turning a peeling eyesore into a stunning architectural feature. Before you grab a brush, it is important to weigh the realities of this project. The pros? You save thousands on replacement costs, preserve the historical character of your home, and protect the metal from further corrosion. The cons? It is a labor-intensive process that requires meticulous prep work, specific chemical coatings, and strict safety protocols to handle potential lead paint and extreme temperature fluctuations.
CRITICAL SAFETY WARNING: This guide involves the mitigation of Lead-Based Paint (LBP) and the restoration of Cast Iron heating elements. According to EPA (Environmental Protection Agency) and HUD guidelines, disturbing paint in pre-1978 housing creates a high risk of Lead Dust inhalation, a neurotoxin proven to cause permanent cognitive damage.
Mandatory Protocols:
- Testing: Always verify lead presence using an EPA-Recognized Lead Test Kit or a professional XRF Analyzer before beginning work.
- Abatement & PPE: If lead is detected, all work must adhere to RRP (Renovation, Repair, and Painting) safety standards, including the use of NIOSH-certified N100 or P100 Respirators.
- Cleanup: Never use standard household vacuums or brooms. Only a HEPA-filtered vacuum and wet-cleaning methods are approved for lead-safe cleanup.
- Fire Safety: Ensure all coatings used on active heating units are thermally rated. Standard alkyd or latex paints can release toxic VOCs or undergo thermal degradation when heated.
This guide is for informational purposes only and does not replace the advice of a certified Lead Risk Assessor.
Tools and Materials
- Oil-based or Shellac Primer
- Waterborne Urethane Alkyd or High-Heat Paint
- Paint stripper
- Non-aqueous solvent (acetone or denatured alcohol)
- Tannic acid rust converter
- Tape or drop cloth
- Respirator
- Gloves
- Sandpaper (40 to 120 grit)
- Lead test kits or an XRF machine
- Soft cloth
- Putty knife
Steps to Painting an Old Radiator
Phase 1: Safe Preparation and Setup
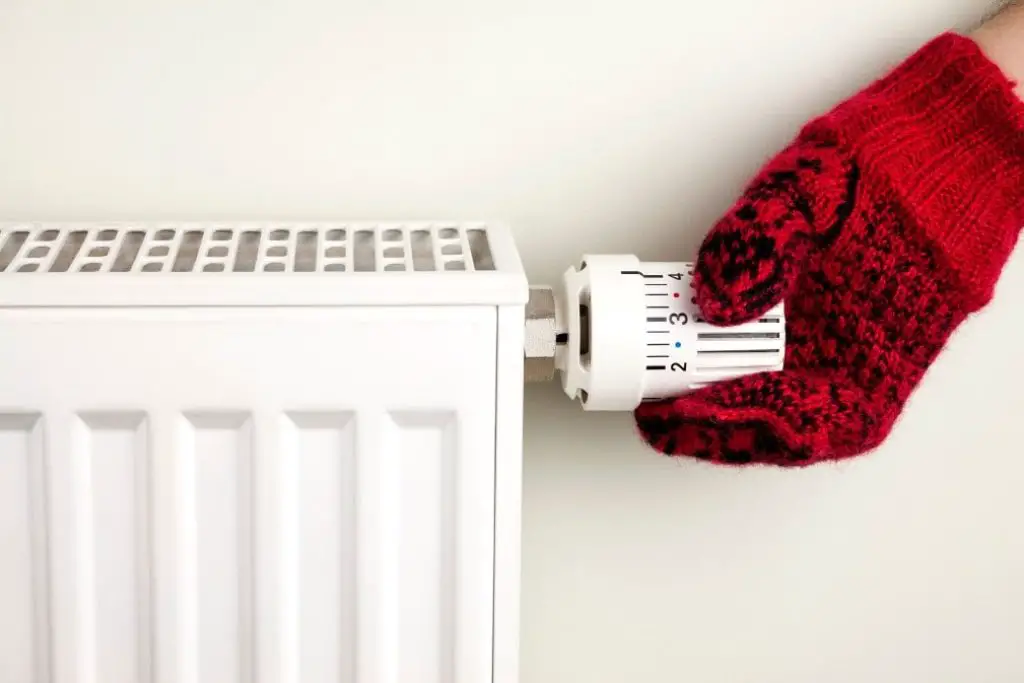
Turn off the radiator.
Turn the unit off by twisting the control valve clockwise at the base. Wait for the unit to cool completely. Wrap the valves and bleeders in aluminum foil. Foil crimps perfectly around irregular shapes and pulls off clean, even after heat exposure.
Prepare the work area.
Move all appliances or furniture out of the immediate vicinity. Clear the area of dust and dirt using a HEPA-filtered vacuum exclusively. Standard vacuums will exhaust fine particulate matter back into the air.
Cover the surrounding floor and walls with drop cloths, painter’s tape, plastic sheeting, or tarps. Ensure the coverage area extends beyond the immediate workspace to catch airborne overspray. Open the windows to ensure proper ventilation and allow toxic chemical fumes from the strippers and paints to safely dissipate.
Check the radiator for lead paint.
Never wipe, degrease, or mechanically disturb the surface of a vintage radiator until you have utilized the ASTM D4138 V-Cut Methodology to confirm it is completely free of historical lead paint.
Before utilizing any abrasive tools or chemical strippers, you must test the existing coatings for lead, especially if the unit was painted prior to 1978. However, be aware of the “False Negative” testing trap. Specific data indicates that over-the-counter swabs, which rely on weak sodium rhodizonate or sodium sulfide reagents, possess a 64% failure rate when detecting lead dust at the EPA hazard standard and routinely fail to dissolve highly insoluble lead pyromorphite and lead chromate salts. To accurately detect historical lead buried beneath modern coatings, you must utilize the ASTM D4138 V-Cut Methodology, slicing an acute 30 to 45-degree angle through the strata to expose the oldest layers to the reagent.
- Professional Abatement: If the lead test confirms the presence of lead and the paint is flaking or peeling, your next step is to hire a professional lead abatement contractor. They can safely prepare the area using proper containment protocols or remove the radiator for off-site chemical dipping.
- DIY Encapsulation: If you wish to encapsulate the fixture rather than fully strip it, statutory guidelines require strict adherence to HUD Chapter 13 protocols. WARNING: Encapsulation utilizes thermoplastic elastomers that structurally degrade and are prohibited on surfaces exceeding 212°F (100°C). Because steam radiators operate exactly at this threshold, encapsulation is strictly prohibited on steam systems. For cooler hydronic systems, you must first perform an X-Cut tape test to ensure the historical paint layers are fully bonded. Encapsulation is strictly prohibited on peeling or flaking surfaces; the thermal expansion of the cast iron will mechanically shear compromised base layers off the fixture entirely, depositing lead chips onto your floor.
Once you have confirmed that the old radiator does not contain any lead, use a putty knife to gently scrape away cracked or chipped paint. After the loose parts are removed, sand the surface to clear the remaining residue. Use a HEPA vacuum cleaner to capture the fine particulate matter. Ensure the surface is clean and dry before proceeding.
Clean the surface.
To clean the surface, do not utilize warm water and a detergent mix. Exposing porous cast iron to water causes immediate flash rust in as little as 5 to 10 minutes. Applying a standard water-based acrylic primer to bare cast iron introduces a conductive electrolyte to the heterogeneous metal, instantly establishing galvanic microcells. At the anodic sites, rapid oxidation pulls ferrous ions into the wet paint film, transitioning into bright orange iron(III) oxyhydroxide (lepidocrocite) that bleeds directly through the finish. Instead, wipe down dirt and grease using fast-evaporating solvents like acetone or denatured alcohol to degrease the surface safely. Wipe it gently with a dry cloth and leave it to flash dry.
Why this happens (The Science)
According to the SSPC-SP 1 standard, aqueous solutions initiate immediate anodic dissolution and create corrosion microcells on bare cast iron. Solvents prevent this by degreasing without introducing an electrolyte.
Remove the paint.
When stripping old paint from a non-lead surface, avoid scrubbing bare metal with TSP and water, which guarantees flash rust. For deep internal columns measuring less than one inch across, standard brushes and sandpaper fail. Professional restorers cross-purpose machinist abrasive cords to “floss” away loose paint in gaps as narrow as 0.055 inches. To scour calcified oxidation from central cavities without gouging the soft cast iron, gunsmith phosphor bronze brushes provide the necessary reach and stiffness without promoting secondary galvanic rusting. You can also use a gel-based paint stripper like Soy-Gel. This formulation traps old paint in a wet gel substance, preventing dry particulates from escaping into the air during the surface preparation phase. When using a gel stripper, allow a dwell time of 3 to 12 hours (depending on the number of paint layers) for the chemical to properly lift the old coating. Once the paint has softened, use a contoured scraping tool or a stiff nylon brush to physically pull the gel and dissolved paint out of the tight cast iron fins before wiping clean.
- Low temperature or steam heat – Use Infrared Paint Removers (like the Speedheater) only. These specialized restoration tools utilize quartz infrared tubes to heat substrates via radiant energy, operating at 400°F to 600°F. Strictly Ban standard high-heat guns.
- Chemical strippers – only the paint itself is affected by the chemical, which makes it a less invasive method. This is best suited for removing paint on surfaces of historical or heritage structures, as well as boats and ships. If using alkaline poultice strippers (like Peel Away 1), you must neutralize the wood with acetic acid (vinegar) after removal. Failure to balance the pH will cause your new paint layer to chemically burn and peel.
Get rid of the rust.
WARNING: Do not sand rust if the paint contains lead. Use a chemical rust remover instead. Only use abrasives (sandpaper/wire brushes) AFTER the lead paint has been fully chemically stripped and the metal is bare.
During our tests with cast iron units from the 1920s, we found that standard latex primer caused flash-rusting within hours; always stick to a dedicated oil-based metal primer.
Sand the affected areas with fine-grit sandpaper between 40-120 grit to remove rust from the surface. You can use a ball of steel wool until the surface is smooth enough to receive paint. Once the rust particles have been scrubbed loose, wipe the surface off with a clean rag dampened with solvent.
If sanding the surface cannot remove all the rust deep within the fins, applying a tannic acid rust converter is a highly elegant chemical solution. Tannic acid chemically converts rust into a stable, paintable surface (ferric tannate). This converted layer is completely stable up to 314°F (157°C), effortlessly surviving the radiator’s maximum service temperature.
Why this happens (The Science)
Tannic acid reacts stoichiometrically with iron oxide to form a highly adherent ferric tannate matrix, as proven by thermogravimetric analysis.
Prime the surface.
Clean the surface by wiping it with a clean, dry cloth. Once you are certain that no dust or grease is remaining, scrub it lightly with fine sandpaper to create a mechanical profile for optimal adhesion.
Ensure you are utilizing a rust-resistant, metal-specific primer.
The Polymer Incompatibility Rule
Strictly ban latex or water-based primers on bare cast iron. The water content in these primers will reactivate oxidation and cause immediate rust bleed-through. Synthetic shellac primers like Zinsser B-I-N utilize a pure alcohol solvent instead of water. Because the alcohol flashes off rapidly and deprives the surface of electrolytes, it entirely bypasses the flash rust mechanism. Alternatively, use tannic acid rust converters to chemically convert residual iron oxide into a stable, inert polymeric coating.
If utilizing an aerosol metal primer, spray at a distance of 12 to 18 inches from the surface using a sweeping back-and-forth motion to ensure even application.
Allow the surface to dry according to the manufacturer’s technical data sheet. Most heavy-duty primers require a minimum 24-hour cure time before topcoating.
Paint the radiator.
Slide a large piece of cardboard wrapped in aluminum foil behind the radiator. This protects the wall and reflects light so you can accurately assess coverage on the rear fins.
The Geometry-Specific Application
Deploy aerosolized oil primer solely for the internal fins and louvers where bristle brushes tend to bridge gaps and drip. To prevent “shadowing” and properly coat internal columns, attach an automotive aerosol extension wand with a 360-degree radial nozzle. This guarantees a uniform polymeric film inside the deep cavities where extreme thermal expansion occurs. Reserve high-density foam rollers exclusively for the flat, external face panels to ensure a smooth, self-leveling finish.
Verify the product label confirms the coating is rated for indoor application and intended thermal limits.
The Coverage Multiplier
Ignore the square-footage metric listed on the can. Radiator convector fins create a geometric surface area multiplier that standard algorithms fail to calculate. Procure exactly 200% of the estimated volume to account for the hidden depth of the metal casting.
The Thermal Cap Limit
Bypass 1200°F automotive header paint or industrial Stovebrite. Residential radiators cannot exceed 212°F (100°C) due to phase change thermodynamics. However, high-heat silicone resins require a sustained minimum bake of 450°F (230°C) for one hour to trigger the thermosetting cross-link phase. Applying high-heat paint leaves the coating permanently semi-cured, softened, and persistently off-gassing VOCs into the living space. Instead, use premium waterborne alkyds or urethane-modified acrylics, which cure fully via ambient auto-oxidation at room temperature.
The Thermodynamic Reality Check
High-heat silicone resins require extreme temperatures to chemically cross-link. Because residential radiators cannot reach these temperatures, the paint never fully cures, leading to a softened finish and permanent VOC off-gassing.
212°F
450°F
Data source: Rust-Oleum TDS & Phase Change Thermodynamics
Do not use standard latex-based paint directly on cast iron components to prevent oxidation. Furthermore, avoid traditional oil-based alkyds for light or white colors. Continuous heat causes standard oil paints to quickly turn yellow. To ensure a brilliant white finish that resists this thermal degradation, specify a modern waterborne urethane acrylic instead.
Why this happens (The Science)
Continuous thermal energy accelerates autoxidation in traditional alkyds, causing the double allylic CH2 moieties to rapidly decompose into yellow chromophores and peroxotitanium complexes when reacting with titanium dioxide pigments. Waterborne urethane acrylics lack the specific double allylic CH2 moieties necessary for this degradation.
When selecting your finish, beware of the emissivity trap. A radiator transfers roughly two-thirds of its heat via convection (120 BTUs) and one-third via infrared radiation (60 BTUs). While non-metallic paints possess high thermal emissivities, metallic paints containing pure aluminum or bronze flakes leaf together to form an infrared radiant barrier. This cuts radiative output by over half, causing an overall system capacity loss of nearly 16.7%. Fortunately, thermal emissivity is dictated exclusively by the outermost micro-layer. You can restore full efficiency by applying a single non-metallic topcoat over any existing metallic finish.
Spray at a distance of 12 to 18 inches from the surface using an even back-and-forth motion. Allow the first coat to flash off for 10 minutes (or as specified by the manufacturer’s TDS) before applying the second coat. Applying coats within the recommended recoat window prevents runs and sagging.
Leave the coating to dry for the specified duration to achieve proper depth and gloss.
The Cross-Linking Latency
Distinguish between solvent evaporation (dry to touch) and chemical cross-linking (full cure). The resin matrix requires a 3-week thermal cycle to reach maximum Shore hardness. Prohibit contact with textiles or furniture until the 21-day mark, or the paint will chip immediately.
Clean up the work area.
Disposal requires strict adherence to hazardous waste protocols to avoid contamination and exorbitant fees. Follow these steps for safe cleanup and disposal:
- HEPA Cleanup: Collect all debris using a HEPA filter vacuum, followed by damp sponges and mops to wipe down floors, ceilings, and walls.
- The ‘Gooseneck Seal’ Method: Place all waste in heavy-duty contractor bags. Twist the neck of the bag, tape it down, loop it over, and tape it again to ensure a hermetic seal.
- Municipal Exemptions: Consult your local sanitation department. Many allow homeowners (but not contractors) to dispose of double-bagged lead waste in standard trash under the ‘Household Hazardous Waste Exemption’.
- TCLP Testing for Large Projects: Under RCRA Subtitle C, waste is classified hazardous by its leachability. For larger or non-exempt disposals, waste must pass the EPA’s Toxicity Characteristic Leaching Procedure (TCLP) test (SW-846 Method 1311) to avoid severe hazardous waste fees. Untreated lead waste leaching at or above 5.0 mg/L incurs massive disposal and transportation premiums.
- Chemical Stabilization: To bypass TCLP friction points, professional contractors use chemical stabilization products like Blastox or integrated gel matrices (like Lead-Out), during removal. These additives trigger molecular hydration and silicate reactions, permanently encapsulating the toxic waste into a cementitious matrix and rendering it completely non-hazardous for legal disposal in standard landfills, slashing project costs by an estimated 82%.
Remove the painter’s tape from the vents and valves before the paint fully cures. This prevents the hardened paint film from being lifted along with the tape adhesive.
Remove the plastic sheeting from the surrounding area by folding the edges toward the middle to contain any settled dust or debris. Clean brushes and applicators immediately.
Never wash lead-contaminated rags. Place used rags, drop cloths, and sanding pads into a heavy-duty trash bag. ‘Gooseneck’ seal the bag with duct tape and dispose of it according to local hazardous waste regulations.
Use mineral spirits or appropriate solvent thinners to clean tools used for oil-based coatings.
Seal all remaining cans and store them in a climate-controlled environment, avoiding extreme temperature fluctuations.
Turn the Heat Back On (And Expect a Smell)
Do not turn the radiator back on immediately after the paint feels dry to the touch. Wait at least 24 to 48 hours for the initial off-gassing to subside, though full curing takes weeks. When you finally turn the valve counter-clockwise to restore the heat, open your windows. The new paint will produce a distinct baking smell as the resins cross-link under the heat. This is normal and should dissipate after the first few heating cycles.
Frequently Asked Questions
Can I paint a radiator while it is hot?
Absolutely not. Painting a hot radiator will cause the paint to flash-dry before it can properly level, resulting in a wrinkled, textured, and structurally weak finish. It also massively increases the volatility of the fumes. Always turn the unit off and let it cool completely.
Will painting my radiator reduce its heat output?
It depends on the paint. Using standard non-metallic interior paint has a negligible impact on heat output. However, painting a radiator with metallic paint (like silver or gold) severely alters the surface emissivity, reflecting heat inward and definitively reducing the radiant heat output by up to 20 percent. According to the foundational 1924 NBS Technologic Paper 254, non-metallic pigments behave as high-emissivity blackbodies (0.85 to 0.95), whereas metallic flake paints restructure the boundary layer into a microscopic radiant barrier, plummeting emissivity to between 0.27 and 0.67.
Can you just paint over it?
Do not cover lead paint with standard interior paint. While temporary encapsulation is a HUD-approved method, it requires highly specific elastomeric coatings to ensure safety. Encapsulation utilizes specialized high-build elastomeric coatings. However, applying these to active steam radiators presents a critical failure point. Thermoplastic elastomers structurally degrade and are strictly prohibited on surfaces exceeding 212°F (100°C). Because steam radiators operate exactly at this threshold, any boiler malfunction will melt the abatement, cracking the barrier and releasing lead dust into the room’s convection currents.
While this method is doable for cooler hydronic units, and even recommended in some cases, you also need to remember that this is a temporary solution and will depend on how long the upper coat will hold up over time.
Take note of the following if you are planning to cover up the lead-based paint with new coat:
- The paint with lead and the surface that will be painted on is still in good condition and has no signs of damage that can produce dangerous dust
- It is done only in locations where the painted surface will be left undisturbed or exposed to minimal traffic that will not subject it to wear and tear
- Do not use standard primer. You must use a specialized ASTM E1795 Certified Encapsulant (e.g., Lead Defender or ChildGuard). These coatings are elastomeric (stretchy) to resist cracking and often contain a bittering agent to deter chewing.
When it comes to dealing with the possibility of lead-based paint, we should always err on the side of caution. Always prioritize safety over saving a few dollars by not confirming its presence.
The Hidden Cost of DIY: Real Estate Liability
Even if you successfully navigate the health risks of DIY removal, you assume a massive financial risk. While homeowners are exempt from the EPA RRP rule for their primary residence, this exemption creates a downstream nightmare. If you eventually sell your home, you must legally disclose lead presence and any uncertified renovations. Because you did not use a certified professional, you cannot provide a Clearance Examination certificate. This missing paperwork frequently stalls home sales, triggers buyer demands for expensive post-remodel environmental testing, or invites seller disclosure lawsuits.
How to Subsidize Professional Lead Abatement
Given the health and real estate liabilities, professional removal is often the safest path, but the $10,000 to $15,000 average sticker price is terrifying. What most contractors gloss over is how to subsidize this cost. You do not always have to pay entirely out of pocket. Look into hidden local government programs and state-level financial incentives. For example, the Massachusetts Lead Paint Removal Credit (830 CMR 62.6.3) offers significant tax offsets for compliance. Additionally, HUD Lead Hazard Control grants and municipal forgivable loans are specifically designed to help homeowners finance professional abatement, offsetting the intense unit economics of the job.


